- BACK
- Clutch Release Mechanism and Bell Housing
- Much has been written about this assembly and the failings due to poor design
- and itting and servicing. I refer once again to a proper pioneer Malcolm Robb who
- has already experienced first hand many years ago most, if not all of the possible
- problems. www.lotus-carlton.fsnet.co.uk
- I had the opportunity of helping a fellow club member to change the bell housing,
- pivot pin and clutch friction disc. The symptoms were as usual a very stiff creaky
- clutch. History was that the bell housing , friction disc, pivot pin and retaining
- screw had been replaced December 2002. In Dec 2003 the pin and retaining
- screw were replaced again. Surprisingly the work was carried out by Monorep,
- who I had always held in high regard.........I suppose it's down to the individual
- fitter on the day, not helped by poor design, however this should have been fitted
- properly first time around, I'm not convinced that the pin was actually replaced
- Dec 2003 at all, and certainly not lubricated in any way.
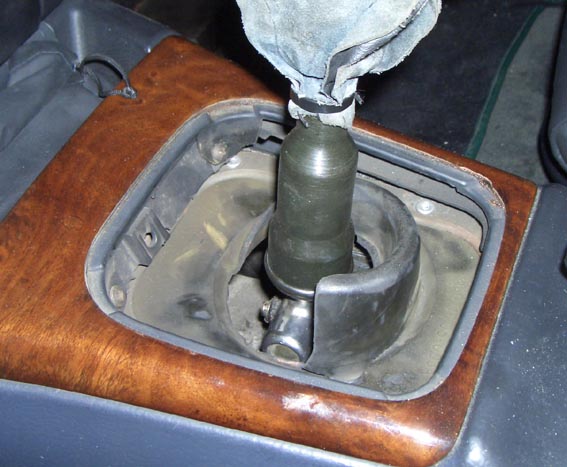
- First jobs were to remove the gear lever assembly from the gearbox from within
- the car. This requires removal of the gear lever surround and rubber gaiter beneath
- to gain access to the 4 bolts that secure the lever assembly to the gearbox.
- Noted as is also most common was that the rubber gaiter was split and chewed
- up, my bet is that the dealers cut holes in the gaiter to get to the bolts, instead of
- drilling out the rivets which secure the gaiter retaining plate to the transmission
- tunnel.
- This was mine. It is not a good idea to try and fit a new gaitor after the gearbox and exhaust is
- back in place especially if you are trying to use nuts and bolts to re-secure the metal frame which
- holds it all in place ;-) To do a proper job you would probably need to lift the centre console up and
- put new pop-rivets in. I wanted to be able to easily remove the gaitor for the next time the gearbox
- needs to come out.
- With the gear lever assembly removed, the rest of work is done from underneath
- the car. Next disconnect and remove the offside down pipe with cat, a nice surprise
- was that the other down pipe can be left in position, this would have been a pain to
- remove as the connection to the turbo manifold is not easy to see, let alone get to
- the nuts. We would have had to lift the charge cooler to one side but in the event
- was saved this work.
- Remove the nuts holding the large heat shield, slide it back towards the centre
- exhaust boxes, (it would probably be a little easier to remove the rubber hangers
- from the mid boxes first) this will then allow access to the socket head screws
- of the prop shaft to gearbox output flange.
- Whilst supporting the gearbox, remove the cross member and mount, I also
- removed the mount bracket.Lower the gearbox down until the back of the
- cylinder head rests against the front bulk head. Also whilst lowering the gearbox
- down, keep an eye in the cooling fan as it will foul the cowling and you will
- need to turn it to avoid this.
- At this point it is a good idea to jack up and support the engine from the sump,
- the reason is that when the gearbox is removed the engine will want to tip back
- to its normal position and you need to prevent this. The gearbox is bolted to the
- bell housing and the bell housing bolted to the engine block. The gear box
- comes out first, then remove the screw which secures the clutch release arm
- pivot pin, in this instance it was already loose! The bell housing can then be
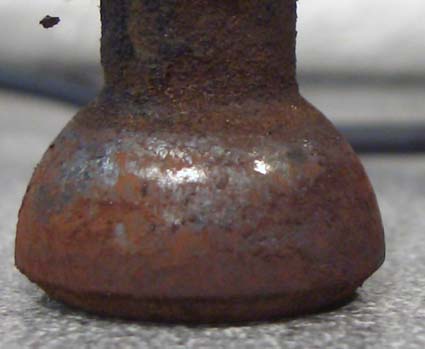
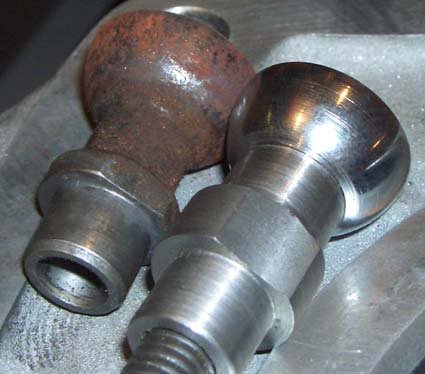
- removed After removing the pin and release arm, it became immediately obvious
- why the clutch felt so bad. This shows the release arm view of the socket and
- the pin, bone dry, rusty and pitted.
More of the old pin.
Old and new non vauxhall re-designed pin with hard chromed working surface.
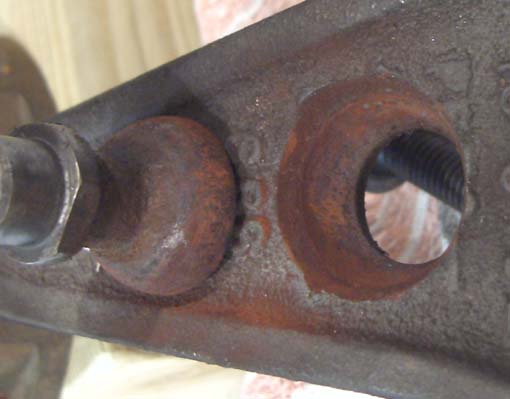
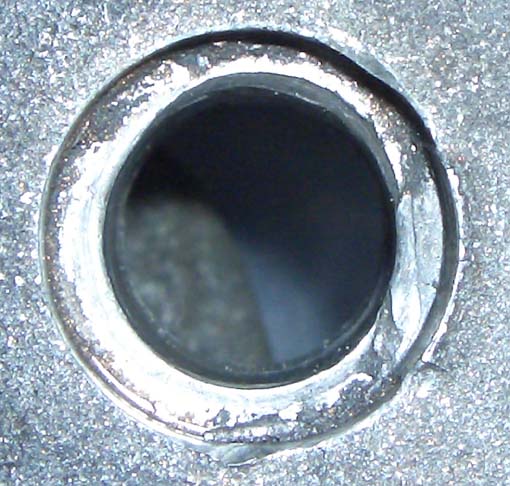
- This shows the damage done to the hole which the pivot pin fits into, the bell housing
- was only 2 years old. Because the pin became loose it rocked backwards and forwards,
- deforming the hole. The owner had already taken the precaution of having his spare bell
- housing modified with a reinforcing plate and modified pin, we decided to fit it. The early
- pin and bell housing versions used a roll pin to prevent the pin from turning even if the
- screw comes loose. Now there is a locating flat on the pin and bell housing.
- In the pic below, it looks as if this has been crushed. (1430-1600hrs), probably accounts
- for the retaining screw being only finger tight, and the deformation of the hole.
Following pictures show the modification to a previously cracked bell housing.
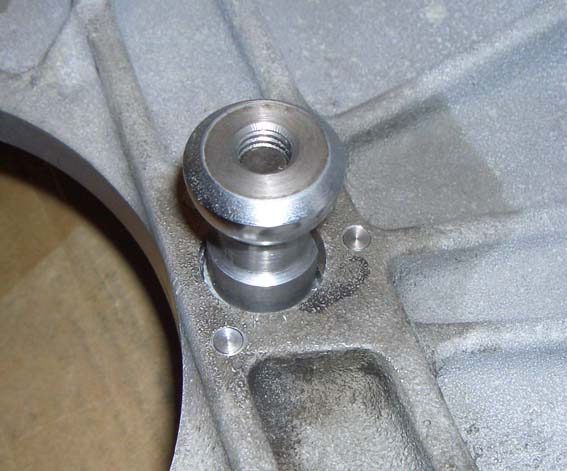

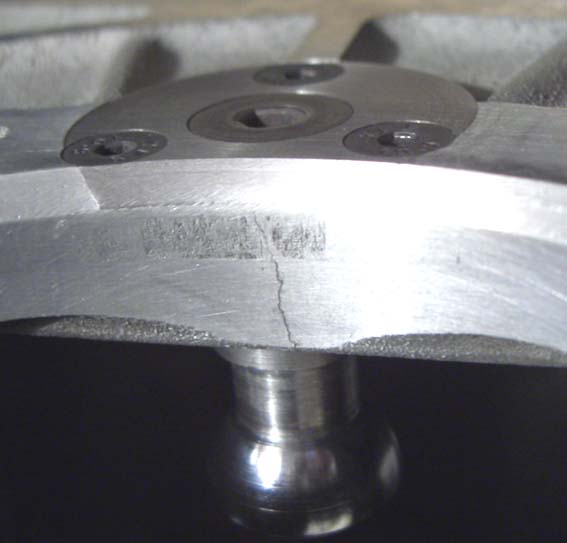
- Evidence of the original crack still visible, with the modification and stronger pin mount
- plate the stresses are more evenly distributed into the surrounding area.
- The loading stress when the clutch is applied is vertically downwards in the picture,
- pulling the pin through the casting.
- Now fully inspired to check out my own clutch, I have a plan to find some way of
- lubricating the pivot pin without the need for bell housing removal. Another possibility
- would be to somehow encapsulate the fork hole and pin and fill the void with grease
- so that grease cannot escape, or dust get in.
Overview pictures of complete (thanks Ian M)
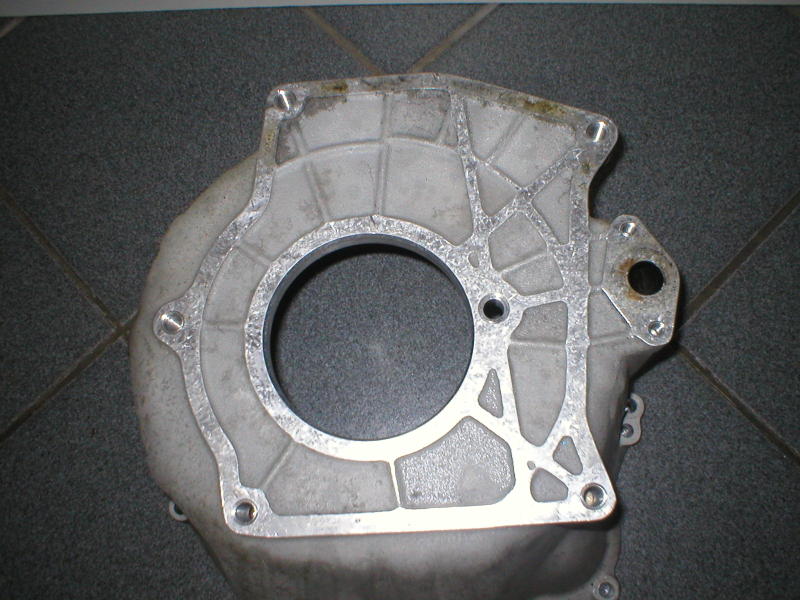
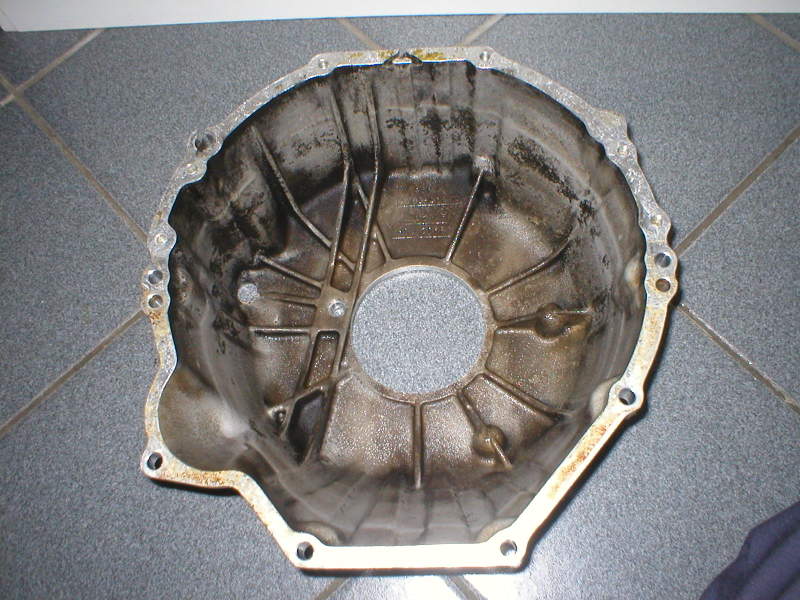
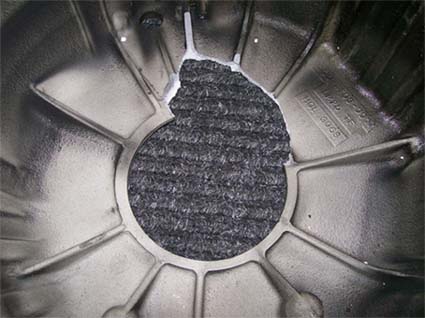
- Below is a picture of an early design bell housing mmm....somthing missing.....
- Compared to above which has more ribs.